
Getting a geocoding API key is the first step toward adding address conversion, location search, and coordinate lookup to any application. The fastest way to get started is through geocoding api key — the entire process from account creation to first geocoding request takes under ten minutes with no approval queue, no credit card required upfront, and no waiting period before the key becomes active.
This guide covers exactly how to get your API key through Distancematrix.ai, how to make your first geocoding requests, and how to configure your integration correctly from the start so it performs well in production.
Step 1: Create Your Distancematrix.ai Account
Navigate to distancematrix.ai and click the sign-up button. The registration form asks only for an email address and password — no company information, no use case description, no approval queue. After submitting the form, check your inbox for a verification email and click the confirmation link to activate your account.
If you have a Google account, the OAuth sign-in option lets you create an account with a single click without filling in the registration form. This is the fastest path for developers who prefer keeping their tool accounts connected to an existing Google identity. Either registration method activates your account immediately with full access to the free tier.
Step 2: Generate Your API Key
After logging in, navigate to the API keys section of your account dashboard. Click “Create new key” and optionally give it a descriptive name — something like “production-geocoding” or “dev-testing” helps distinguish keys when your account has multiple. The key generates instantly and appears in your dashboard alongside usage statistics once requests begin flowing.
Distancematrix.ai supports multiple API keys under a single account, which matters for managing different environments correctly. Creating separate keys for development and production from the start — rather than using one key everywhere — makes rotating credentials, tracking usage by environment, and applying different restrictions to keys straightforward as your project grows. Set this up before writing integration code rather than refactoring later.
Copy your API key immediately after it appears and store it somewhere secure. Treat it like a password — it authenticates your billing account and controls access to your geocoding requests. Never commit API keys directly into source code or configuration files that get pushed to version control. Use environment variables or a secrets manager instead.
Step 3: Make Your First Geocoding Request
With your key in hand, making a geocoding request is straightforward. The Distancematrix.ai geocoding endpoint accepts GET requests with your address and API key as query parameters. For forward geocoding — converting an address to coordinates — the request looks like this:
The response returns JSON containing the matched location’s coordinates, formatted address, and component-level address fields. Check the status field before processing results — “OK” indicates success with at least one match, “ZERO_RESULTS” means no match was found, and “INVALID_REQUEST” indicates a problem with the request format. The results array contains matched locations ordered by confidence, with the first result being the highest-confidence match for most use cases.
For reverse geocoding — converting coordinates to an address — use the latlng parameter instead of address:
https://api.distancematrix.ai/maps/api/geocode/json?latlng=37.4224764,-122.0842499&key=YOUR_API_KEY
Understanding the Response Structure
Knowing what each field in the response contains prevents common integration mistakes that surface only in edge cases.
| Field | What It Contains | Common Use |
| status | Request outcome (OK, ZERO_RESULTS, etc.) | Always check before processing results |
| geometry.location | lat and lng coordinate pair | Store for map markers and distance calculation |
| formatted_address | Clean, standardized address string | Address validation and display |
| address_components | Individual fields: street, city, state, postal | Extracting specific address parts |
| geometry.viewport | Suggested map bounds for the result | Setting map zoom level for display |
API Key Security Best Practices
API key security determines whether your geocoding integration remains controlled and predictable. Keys that get exposed in public repositories or client-side code can be used by anyone, resulting in unexpected billing and potentially exhausting your rate limits. A few habits prevent most key exposure incidents.
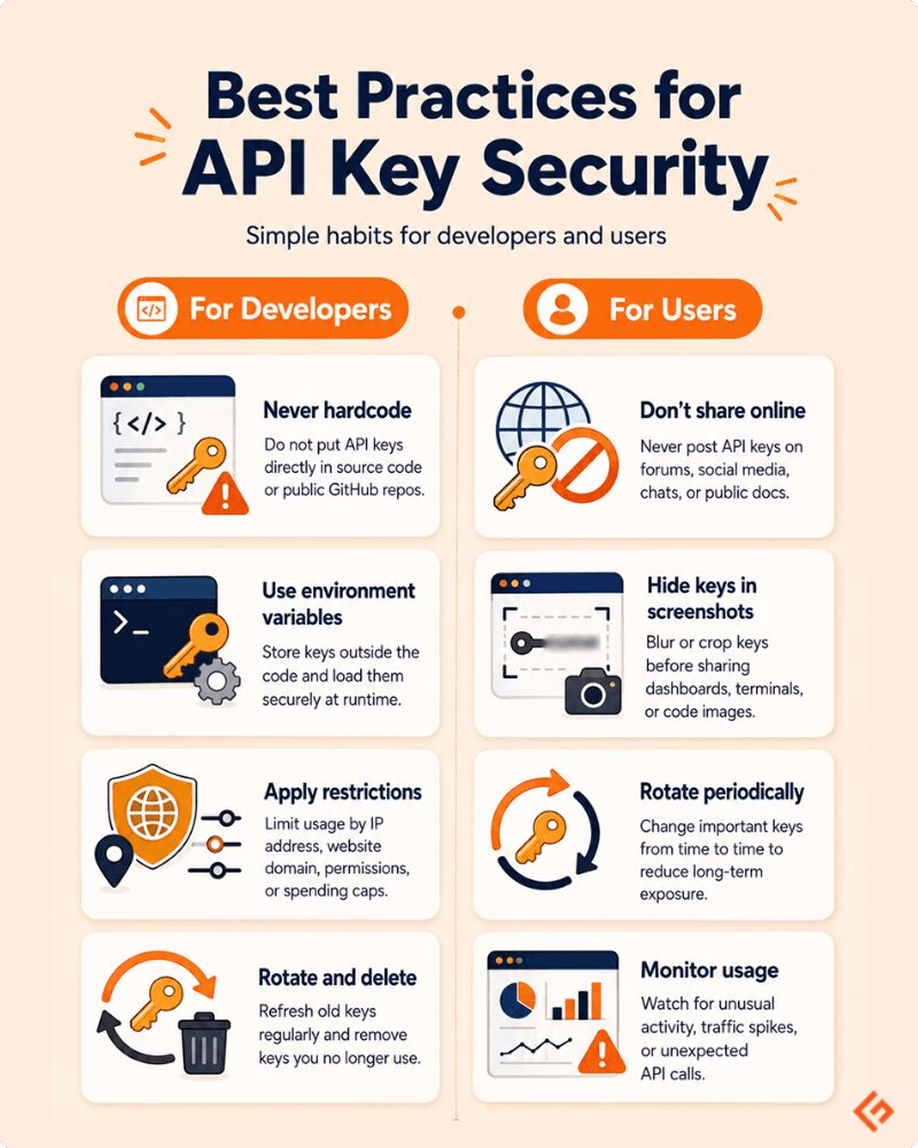
Store API keys in environment variables rather than hardcoding them in source files. On development machines, use a .env file loaded at runtime. In production environments, inject the key through your hosting platform’s secret management rather than including it in deployed code. Add .env files to .gitignore before making your first commit — retrofitting this after accidentally committing a key is more painful than preventing it.
For client-side applications where the key would be visible in browser network traffic, proxy geocoding requests through your own server. The client calls your endpoint, your server adds the API key and forwards the request to Distancematrix.ai, and the key never appears in client-visible traffic. This adds one network hop but keeps credentials controlled.
- Use environment variables for API keys — never hardcode in source files
- Add .env to .gitignore before your first commit to the repository
- Proxy client-side geocoding requests through your backend to hide keys
- Create separate keys for development and production environments
- Rotate keys immediately if you suspect exposure — don’t wait to confirm
Testing and Validating Your Integration
Before relying on geocoding in production, test your integration across the address types and edge cases your application will actually encounter. Standard, complete addresses from major cities work on every provider — the revealing tests involve the specific inputs your users will submit.
Test with partial addresses where users might omit city or state. Test with addresses in every country you serve — accuracy varies by region and discovering gaps during development is far cheaper than discovering them through user complaints. Test your application’s behavior when geocoding returns ZERO_RESULTS — does it fail gracefully with a useful message or does it crash? Test with multiple results in the response array — does your application always use results[0] correctly or does it break when disambiguation is required?
Run load tests at the request volumes your application will generate in production. Rate limit handling that works at development request rates sometimes breaks under production load when requests come in faster than your backoff logic expects. Verifying this before launch prevents rate limit issues from surfacing as user-facing errors on release day.
Ready to Build
Getting a geocoding API key from Distancematrix.ai is the simplest path to reliable geocoding infrastructure in 2026. Account creation, key generation, and first successful geocoding request are achievable in under ten minutes with no approval process or upfront commitment. Their free tier provides real testing capacity, usage-based billing eliminates monthly minimum risk, and their documentation covers everything needed for a production-ready integration. Start at https://distancematrix.ai/guides/get-geocoding-api-key and have your first geocoding request working before your next meeting.