Social media platforms like Instagram and TikTok thrive on short, engaging videos that captivate audiences within seconds. Whether you’re a beginner or a professional actively using social networks, the CapCut desktop video editor offers top-notch and easy-to-use tools for efficient video editing of your creative projects.
The Popularity of Instagram Reels
Since its launch in August 2020, Instagram Reels quickly became one of the most engaging features on the platform as it tapped into uncharted territory in content creation and consumption. Today, in 2025, Reels has an estimated 2 billion monthly active users, with over 200 billion Instagram videos played daily across Instagram and Facebook. Reels’ meteoric rise to fame is primarily due to its ability to entertain a large audience with short, crisp content, which is widely promoted by Instagram’s intelligent algorithm. Compared to an average reach rate of about 30.81% for traditional posts, Reels shine even more brightly, with a much higher popularity than ever seen in other types of content on Instagram. Interesting to note is that they gain 22% more engagement with followers than current standard video posts, so Reels offer brands and content creators the opportunity of greater visibility. Using an animated video maker can further enhance this visibility by transforming simple ideas into eye-catching motion content that resonates with Reels audiences.
Crucially, the high entertainment value of Reels fosters their growing acceptance, as users want a little dose of fast shorthand entertainment. It is said that in a matter of seconds, viewers can gorge on more videos using this addicting feature. Brands and influencers use Instagram Reels to announce products, share useful tutorials, and engage in viral trends, ensuring that their presence shares nothing but freshness. Sound is used in approximately 80% of Reels, giving music, sound effects, and voiceovers importance in this form of content. This is why video editing apps like CapCut are indispensable for high-quality video, scroll-stopping video creation to be visible on users’ feeds.

Reels have also seen a major pull with trending content; according to Statistics, content uploaded to Reels rose by 46% in volume between 2022 and 2023, proving its ever-increasing prominence.
The impact of Instagram Reels’ success has rippled through social media trends outside Instagram. As Reels borrow heavy inspiration from TikTok’s short-form video model, Instagram has been constantly upgrading Reels with creative tools, transitions, effects, and soon-to-come AI features in order to keep the users engaged. With short video form prevailing over the digital sphere, Reels are becoming a must-have content strategy for influencers and businesses to keep ahead and into the game. For users looking to maximize their Instagram and TikTok presence, using tools like “custom link in bio” can be a game-changer. It allows you to convert your Reels and TikToks into interactive experiences that go beyond just viewing, turning followers into active participants or engaged customers.
In simple words, Instagram Reels is more than a trend; it is a way to digitally narrate stories, grow audiences, and create strong bonds with brands. As more social media platforms emerge, Reels are prominent in content innovation yet have an open door for limitless creative expression and audience outreach.
Why Choose CapCut for Instagram Videos?
Developed by ByteDance, it’s designed with content creators in mind. It has features that allow for easy editing, detailed customization, and publishing settings suitable for Instagram. In this guide, we’ll show you how to enhance your videos for Instagram Reels using the CapCut desktop video editing app.
Key advantages of CapCut include:
- User-Friendly Interface: Perfect for those who want quality photos but do not want to spend a lot of time learning how to use complex equipment.
- Cross-Platform Integration: Use Sync mode to easily transfer projects between devices for further editing.
- Custom Aspect Ratios: Perfect for 9:16 vertical videos essential for Instagram Reels.
- AI-Powered Features: Includes closed caption, background removal, and trending effects.
How to edit videos for Instagram Reels?
Step 1: Download and Install CapCut
Firstly, you should download the CapCut desktop application from the official website of the program. After the installation, you should follow the following steps: Start the program. After installation, create an account or log in to access your Project and templates across the device.
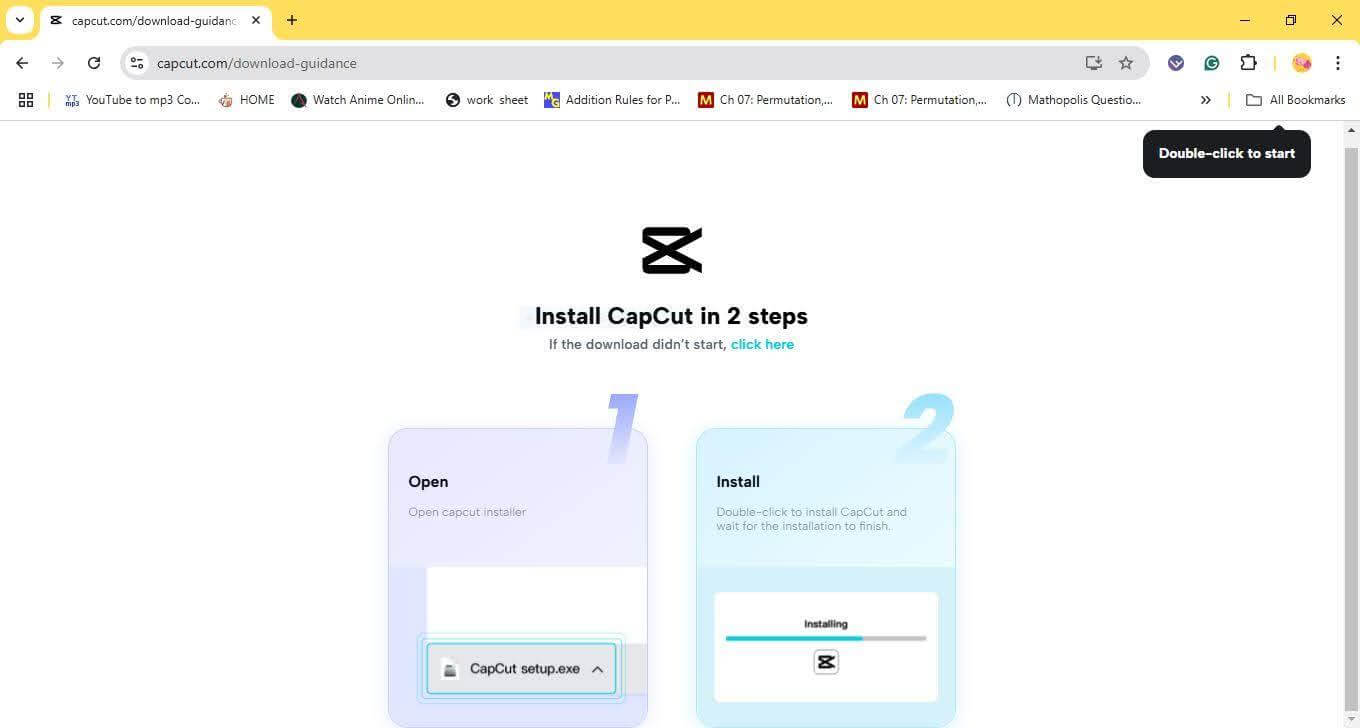
Step 2: Begin Your Creative Journey
Choose Your Aspect Ratios
Click on “Create project” and select the aspect ratio 9:16 to maximize the video for the kind of viewing intended for this new format. This is the typical format for Instagram Reels.
Import Your Footage
You can upload your clips, photos, or audio files into the media library by simply dragging and dropping them. You can also upload files from your device.
If you’re using CapCut as a video editor for reels on PC, you can import videos from external drives, cloud storage, or even capture new footage directly from your device.
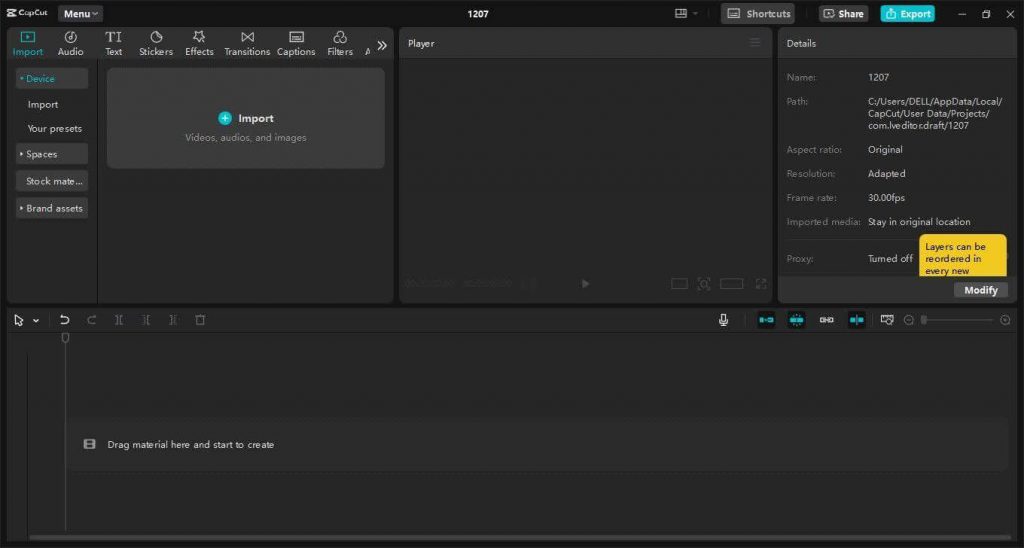
Step 3: Edit Like a Pro
Here are the CapCut desktop video editor tools to help in achieving your vision: Here’s how to make your edits stand out:
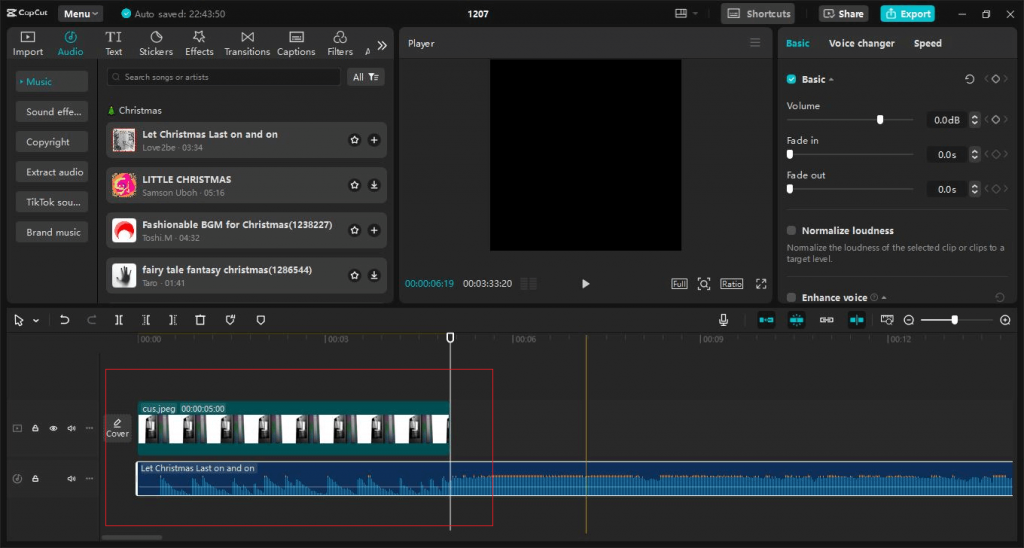
Cut and Trim
- You can easily cut or trim unnecessary scenes on the timeline and create a smooth transition between scenes.
- You should always make cuts at the nice beat or the actions.
Add Effects and Filters
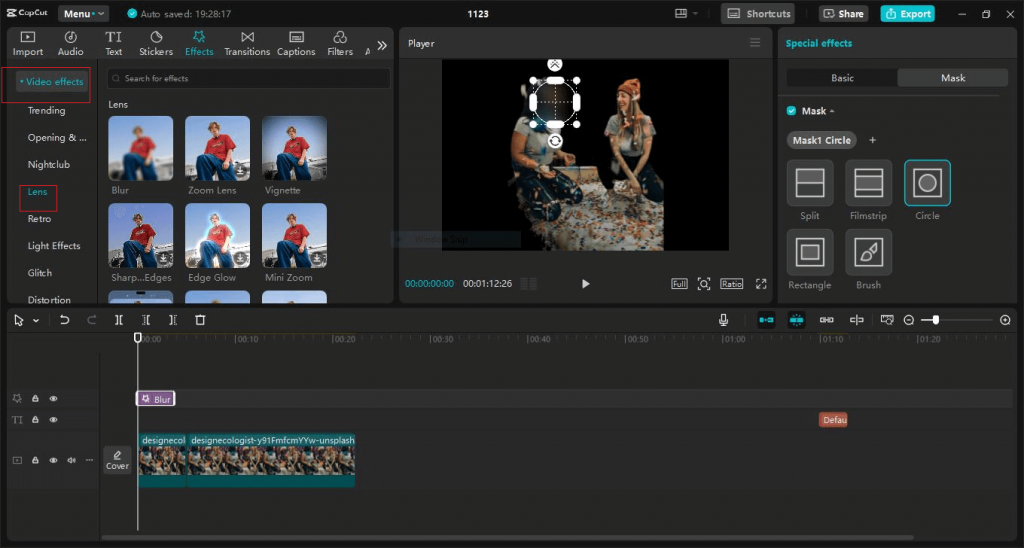
- Based on your video, you can select from CapCut’s range of filters to give a specific mood to your video.
- Try new effects, for example, modern glitches or retro appearance to make your content unique.
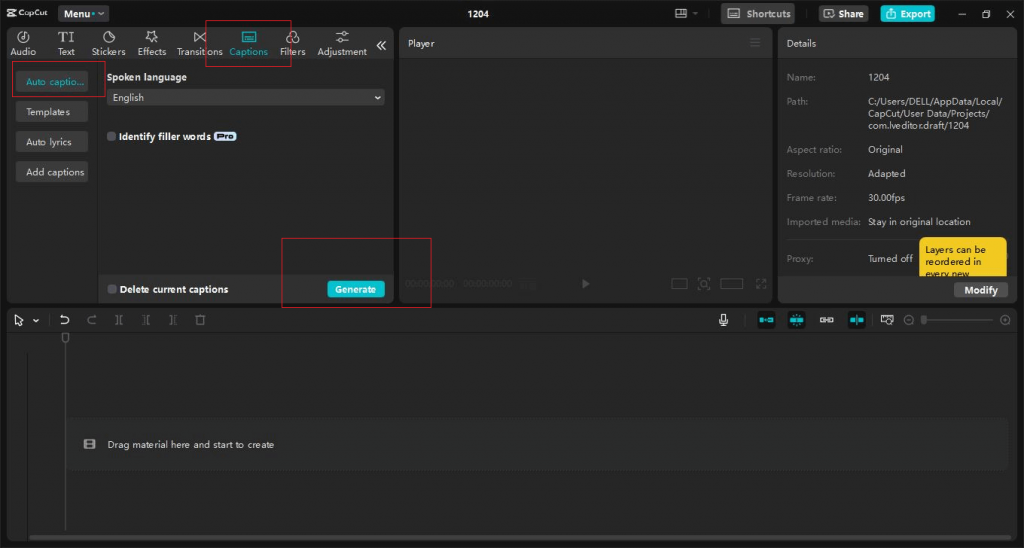
Insert Text and Captions
- You can utilize the text overlays tool for bold headlines or funny quotes.
- Enable closed captions for better accessibility and engagement with followers.
- Use the feature provided by CapCut to automatically create subtitles since they are crucial in ensuring audience retention until the end of the video.
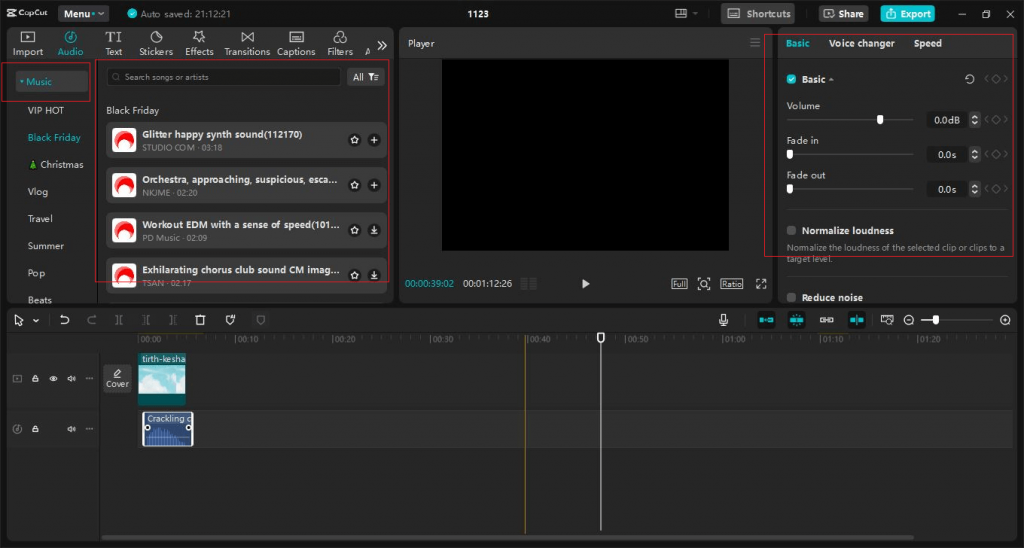
Incorporate Music and Sounds
- Combine your video clip with trending music tracks from CapCut’s music library to fit in with popular trends on this platform.
- Change the volume and apply fade in/out for the perfect sound effects transition in the audio.
- It is often helpful to overlay basic sounds such as clap, swoosh, or other fun elements to your video.
- If the video has voiceovers, take advantage of CapCut’s text-to-speech for professional narrations.
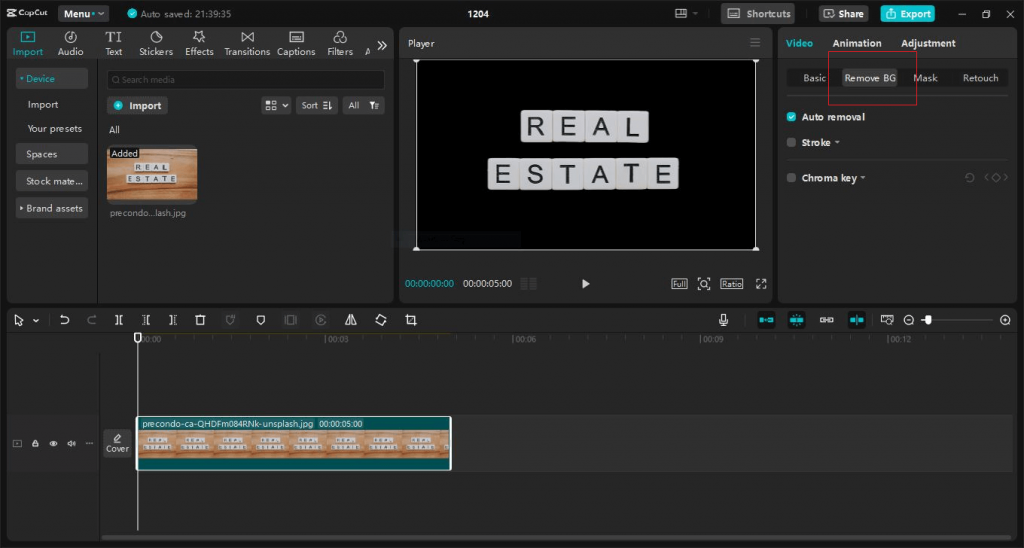
Leverage AI Features
- Employ the background remover to easily remove the background and make the subjects stand out for an effective and stylish look or replace the background with the desired picture or clip.
- If you want to make some words or effects follow subjects in a scene, try motion tracking.
Step 4: Fine-Tune Your Video
After adding the bells and whistles, it’s time to refine your video.
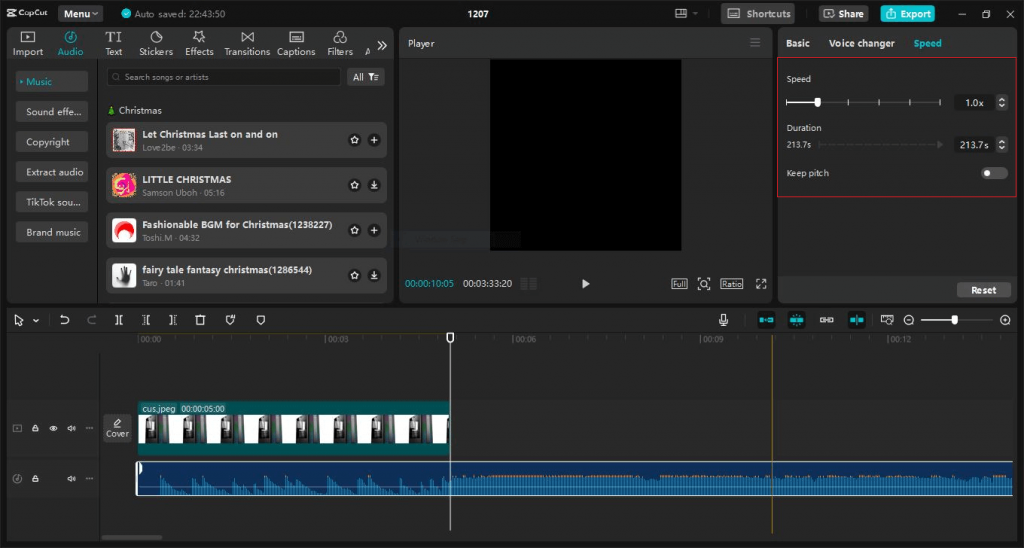
Adjust Speed: Use slow-motion or fast-motion effects on certain clips to generate powerful moments in the video.
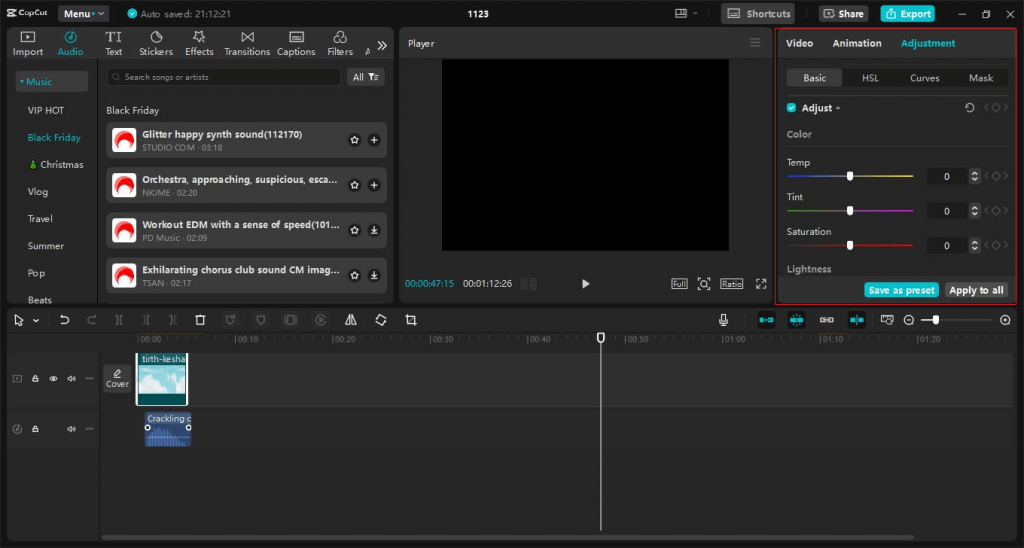
Color Grading: Apply high-quality video settings such as brightness, contrast, saturation, and more to make your visuals stand out.
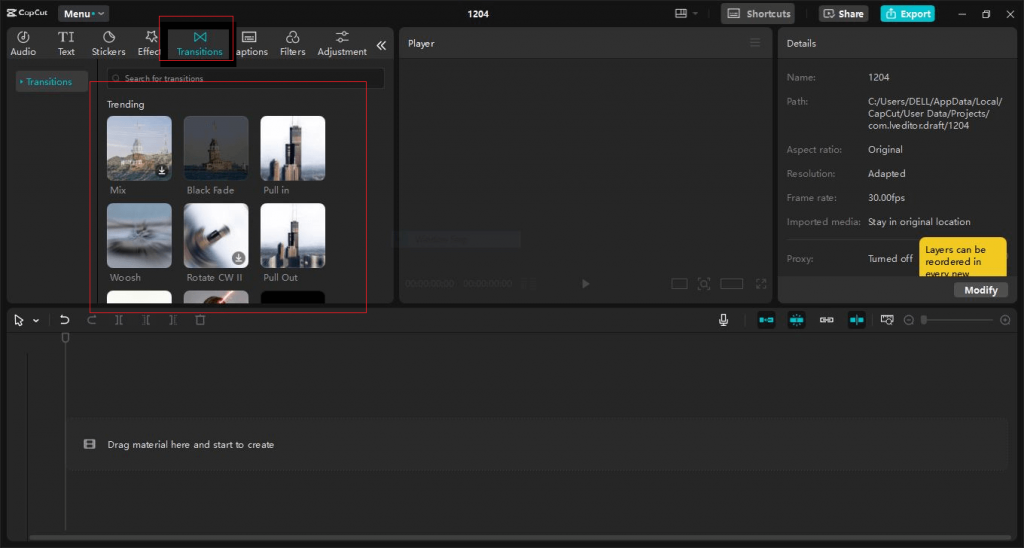
Transitions: Try creative transition effects, like zoom effects or fades, to seamlessly guide your audience through the story.
Step 5: Export Your Masterpiece
Upon being satisfied with the video results, the next step is to click the export button. Here’s what you need to consider:
Resolution and Quality: Export in 1080p for better image quality while sharing on Instagram Reels.
Frame Rate: Indeed, use 30 frames per second (FPS) to ensure smoothness in the playback of the video.
File Format: MP4 format is the most suitable for any platform.
After completing the editing process in CapCut, you can save the file for use in Instagram Reels.
FAQ
1. What is the best video editor for Instagram Reels?
CapCut is a popular and user-friendly video editing app for Instagram Reels, offering advanced tools like AI-powered features, text overlays, and transitions tailored for Reels and TikTok.
2. How to start editing your reel for Instagram Reels on CapCut?
To start editing, download and install CapCut, open the application, create a new project, and select the 9:16 aspect ratio to optimize your Instagram videos for Reels.
3. Where is the overlay button on CapCut desktop?
The overlay button can be found in the menu options within the editing toolbar. This feature allows you to layer images, text overlays, or GIFs to create a more visually appealing and polished reel.
4. What is the ideal resolution and frame rate for Instagram Reels?
Export your high-quality video in 1080p resolution and 30 frames per second (FPS) to ensure smooth playback on Instagram.
5. Can I edit Instagram Stories with CapCut?
Yes, CapCut allows you to edit Instagram Stories by adjusting the aspect ratio and using features like text overlays, filters, and background music from its music library.
6. How do I add text and captions to my Instagram Reels?
CapCut provides a text tool to add text, captions, headlines, or animated text. You can also use the auto-caption feature to generate closed captions automatically for better audience engagement.
7. Can I use CapCut as a video editor for TikTok and Instagram?
Yes, CapCut is designed as a video editing app for TikTok and Instagram, making it easy to create high-quality content for both platforms with seamless aspect ratio adjustments, interactive stickers, and trending effects.
8. How do I add music to my Instagram Reel in CapCut?
You can add music from CapCut’s built-in music library or upload your own original audio. Adjust sound effects, volume levels, and apply fade-in/out effects for a professional touch. You can also use the music note icon to search for trending tracks.
9. What are some editing tips for making engaging Instagram Reels?
- Keep your video short (15-30 seconds)
- Use fast cuts and smooth transitions
- Sync music tracks with your visuals
- Add text overlays for better engagement with followers
- Experiment with CapCut’s trending effects and range of filters
- Use the sticker button to add interactive stickers and other fun elements
10. How do I export and share my Instagram Reel after editing?
Once you’re done editing, click Export, choose MP4 format, and set the resolution to 1080p. After exporting, upload the video to Instagram Reels using the Instagram app for sharing
Conclusion
Creating professional Instagram Reels and TikToks doesn’t require expensive software or years of experience. Everything is smooth and seamless with the CapCut desktop video editor, so you can focus on creating and sharing your masterpieces with your community. Get CapCut today and let your imagination take center stage—one scroll-worthy video at a time!


